Wednesday 26 December 2018

Santa has been!

Happy Day after Christmas!
I hope everyone had a lovely Christmas Day - I did - lots of lovely crafty stash from hubby... who proved that whilst I was muttering about  'Mmmmm that's a nice stamp - would really like it '  he was listening!
So I plan to spend the next couple of days playing about with the new stuff - be rude not to show how much I am enjoying the presents now wouldn't it???😊😊
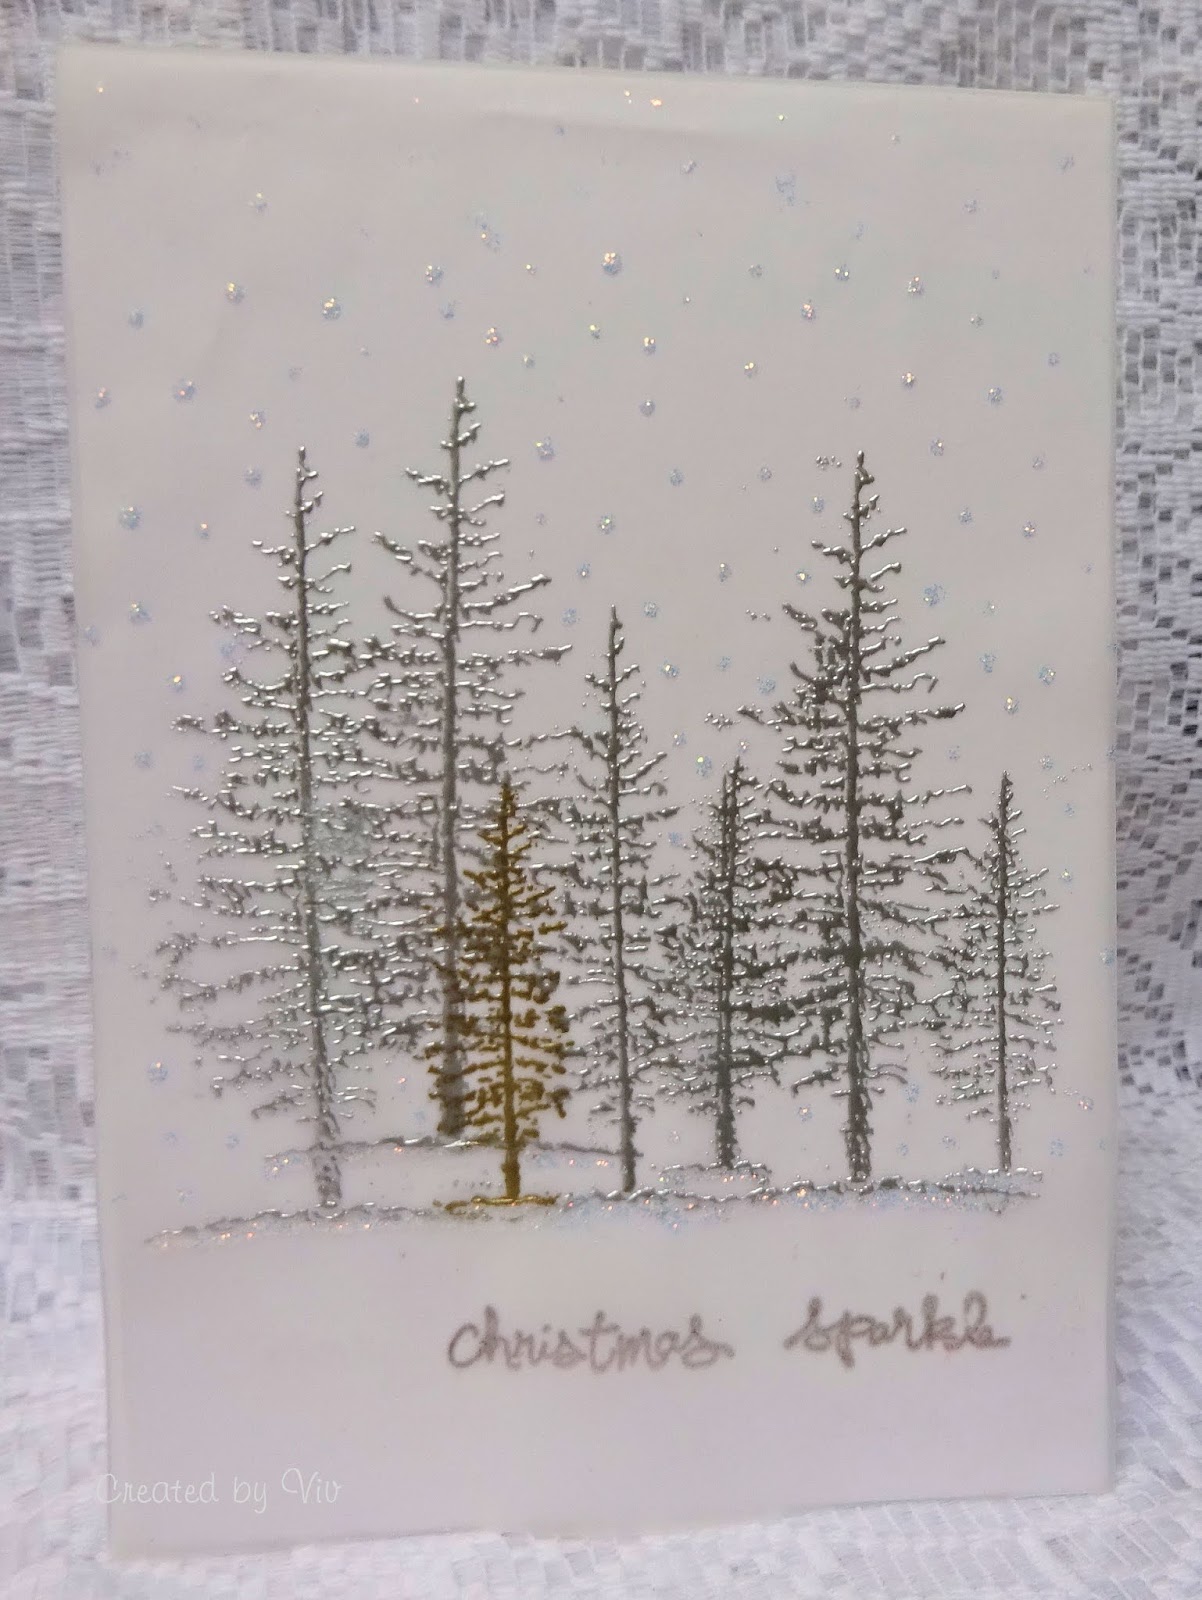
Unsurprisingly though, today I am going to share a card made for sending next year - another one inspired by a Pinterest trawl.
(I actually don't know how many hours I spend looking at other peoples stuff instead of making myself!)

This card all made with little snippets of card laying about from the big Christmas card make, .
Have now had a BIG clean up on the desk and I was surprised to actually SEE the craft mat - been a long time since I have made it's acquaintance!

Used a 'snow' embossing folder on the card base and die cut 2 small circles.
On the smaller circle I brushed over some Peeled Paint DI then had a little bit of splattering fun with Festive Berries DO.

The holly flourish die I have had for a while, and the larger holly leaves and berries was a purchase earlier this year. Both again cut from tiny bits of card. The larger die cuts out the leaves and berries separately - trying to find 3 tiny berry circles amongst all the mess on the desk was fun (not 😕)

After painting all the die cuts I used some Glossy Accents on the all berries and sprinkled a little glamour dust onto the berry trio.
The sentiment was coloured with Festive Berries and also given a dose of glossy accents.

Am paying a visit into the Playground - (hoping that there's some Mince Pies left), although I will have to be well wrapped up as I am still suffering with that nasty cough!


Enjoy the rest of the Festive holidays everyone! x

Saturday 22 December 2018

Santa is on his way

I love this Santa stamp!
Sadly he doesn;t belong to me so when I got an opportunity last year to steal him for an hour from a crafting buddy I stamped him rather a lot.... brought lots of him home.... and promptly forgot about him. 😧😧

So there I was putting away the Christmas stash for another year and he was there looking at me from the drawer.
He was still smiling so maybe he isn't too annoyed - and hopefully he will still come and visit me in a couple of days.

Coloured him lightly and popped him behind a die cut frame then added a few holly bough die cuts.

Gave him a bit of sparkle and finished card - unfortunately he will have to go back in the drawer now till next year!!

I have been quite poorly this week with what I can only describe as what started off as a cold but quickly developed into the worst cough in the universe. 😷
I ventured out to do some food shopping on Thursday and it only served to make me worse. I have been indoors ever since.
I am hoping that by Monday I at least start to feel a bit better - otherwise it will be Christmas Day in my PJ's on the sofa wrapped in a blanket feeling very sorry for myself!

If this is your last visit to me before the Big Day, I wish you all a happy Christmas surrounded by those you love. xx

Joining in at
MMM - CAS Christmas
Use Your Stuff - Christmas
LRW - All things Christmas
Dies R Us - Christmas
TIOT -  Santa

Tuesday 18 December 2018

Mid Month at Stamping Sensations

Not long to go before 25th and it is time for our mid month reminder at Stamping Sensations. If you're needing last minute reasonably quick cards here's one! Our theme is 'GLITTER AND SPARKLE'.

I am STILL trying to use up the coloured card mountain - barely a dent sadly..... but I AM trying!

Navy blue card this time -

Stamped and embossed the snowflakes then die cut the oval aperture.
Took a scrap of glitter card and die cut a smaller oval, then put it on small foam pads behind the big oval.
I stamped and embossed the tree on the base card then simply layered it all up.
Added a teeny sparkly at the top of the tree and job done! Quite pleased as it looks very effective and didn't take long to do.

Be Creative are our sponsors this month so make sure your entry has stamping as the focal point to be in with a chance to win, pop over and link up and good luck!

Monday 17 December 2018

Last Minute cards

I for the first time in a long time am not panicking that I haven't made enough cards!
I am just using up stuff out on my desk and have made another for next year's stash.

This was seriously one of the quickest cards EVER!

A couple of (very) old tree stamps stamped and heat embossed onto a scrap of linen card.

Some Stormy Sky DI and a penny to create the sky!

A sentiment stamped inked in Versafine Majestic Blue.
Some Stckles sparingly used for a teeny shimmer of snowdust
All layered onto a base card and done!

Joining in over at
Allsorts - Trees
HIMCR - Keep It Simple with Xmas
HLS CAS - CAS Emboss
Fashionable Stamping - Winter

Well the snow I was looking forward to didn't materialise at all - so contented myself with making snowy scenes instead!
Hope all is well in your part of blogland and thanks for stopping by. x

Thursday 13 December 2018

Is the snow coming?

We may have a light dusting of snow at the weekend.... it probably won't last but I confess to liking to look out at the snow covered fields!
So my share is a card featuring snowflakes today (in anticipation!😀😀)

I have had this snowflake background stamp for several years. I have no idea of the manufacturer as it is another I removed from the wood block as my stamp collection grew and I needed more storage space!

The stamp is only about 3" x 2" so I had to randomly stamp a couple of times to cover the card front then heat embossed in white.

I brushed over Tumbled Glass DI and then 'polished' the card front with a paper towel to remove any excess ink from the top of the snowflakes.

I cut the card with a wavy stitched die then mounted it onto base card.

The snowflake was cut from some left over blue sparkly paper which matches the DI and I added a blue pearl in the centre. Finished by stamping the sentiment and heat embossing onto a scrap of vellum.

Joining in at
Cute Card Thursday - Embossing
Back 2 Basics - Resist technique
C@SS - Anything Christmas
HTSB - Tic/Tac/Toe (Snow, Blue, Emboss)
City Crafter - Snowflakes
CAS Mix Up -Emboss Resist/Stamping/Die cutting

And armed with my little bits of leftovers I am popping over to the Playground to see Miss Di, Parsnip and the gummy fur ball Dudley (he's losing his baby teeth!) - he's been the doggy parlour too so he smells nice!
Hope you are all safe and warm in your part of blogland and thanks for visiting. x

Saturday 8 December 2018

Poinsettia and Pixie Powders

It's a horrible day here! The wind is howling so a perfect day to sit in the craftie space - like I needed an excuse.
This card was inspired by a lady called Holly Brown who made several cards like this in different colours.
I have much neglected the Pixie Powders and the Brushos of late in my desire to make quick  CAS cards but to be honest, this card was really just as quick as many of the others I have made.

I have the Powders and Brushos still out on the desk so am going to do a few more in different colours and then do some for Birthdays instead of Christmas using different flowers. 

I only have 3 Poinsettia stamps. One is for layering/die cutting and not suitable and the other is a PB Watercolour one - again no good for this!
This one is from PB's Wonder Collection and was a challenge win some time ago! I teamed it up with a Holly stamp from Woodware's 'Christmas Greenery' set.

Stamped, embossed then masked the Poinsettia then stamped and embossed the holly.
I used 'Midnight Blue' Pixie Powder on watercolour card.
I am still perfecting using powders -but think this one turned out OK, although I usually am too heavy handed when sprinkling the powder.
The sentiment stamping was a disaster hence the addition! 

Sharing over at
Alphabet - S for Seasons Greetings
Just add Ink - 'I'nky Techniques
Allsorts - Christmas Flowers
Beccy's Place - December
The Flower Challenge - Use an Older stamp

Thanks for looking and I appreciate any comments you leave.
Hope you are warm and dry in your part of blogland! x

Monday 3 December 2018

Stars

Doing some more Christmas cards as although I think I have enough for myself this year, I decided that it wouldn't do any harm to keep making whilst I have all the Christmas stash out - (any excuse not to tidy up this mess of a craft room  😛😛)

Finished this one today for the challenge over at CAS Christmas which (would you believe) is Stars!
OK so there's only ONE star on here but it IS a very sparkly one!

This was a CASE of one I made last year - and the year before- and probably the year before that!  I like the simple design and the bonus is it doesn't take very long.

Used the 'Snow' embossing folder on an odd piece of card and layered it onto mirri card (which as we all know is an absolute PIG to photograph)
The branch and the star simply cut from glitter card. A little bit of red cord wrapped round the branch and stuck to the star.

Finished with a Penny Black sentiment inked in Silver metallic ink.

Also sharing over at
Country View Challenges - Christmas


The weather here has been very wet and the forecast is for dry but very cold. Can cope tih cold but I hate wet! So maybe I might go for a walk tomorrow to blow away the cobwebs..... and not have to tidy the craft room! Have a great day whatever you're doing and thanks for visiting! x

Sunday 2 December 2018

Stamping Sensations December Challenge

The brand new challenge at Stamping Sensations this month is 'GLITTER AND SPARKLE'!

Be Creative are our sponsors this month so make sure your entry has stamping as the focal point to be in with a chance to win!
I have used their embossing powders on this card.

I had a bit of a brainstorm with this - halfway through I was thinking why oh why did I use vellum?!!
Seemed like a good idea before I started......

Vellum on a white base card.
Stamps used are 'Twiggy Trees' by Inkylicious.
Embossed 6 in silver and one smaller one in gold.

Stamped the sentiment in Smokey Grey Versafine ink and clear embossed.

Added lots of stickles drops to the sky.

Overall am quite pleased with the way it turned out - It IS really sparkly in real life and didn't take too long to do, although I had to use a sticky sheet specifically for vellum to attach to the card in an attempt to get it to lay flat as the vellum had warped a little with the heat gun!

Please go over to the blog and see what my teamies have done too - we love visitors!

Have a great day whatever you're doing. x
Linking up at -
PB& More -  Trad Xmas Colours (Gold and Silver)
Crazy4Challenges - Tree
CAS on Friday - Christmas
Fussy & Fancy - Winter/Christmas
Back 2 Basics - Stamping on Vellum
That's Crafty - Winter Wonderland