This week we have done a little bit of decorating in the room where we spend most of our time - the craft/music/online gaming room. (The latter 2 are not me by the way!)
I am a messy crafter. Over the years since we have been here I have dropped ink pads (always the pad side down) onto the carpet tiles, splattered odd bits of Brusho here and there, managed to get glue everywhere - you get the picture.
I am now sat in the freshly painted room with some nice new flooring and the comment 'Let's see how long it takes for you to make a mess'...... 😳😳
So not being apprehensive at all I got out the ink......................
A linen textured card base called for a linen textured panel. After inking, I took 2 stencils inking with 2 more different shades of green.
Stamped and clear embossed the leafy branch and watercoloured.
A few drops of white Nuvo and a stamped sentiment.
The ink mustn't have been completely dry as the white Nuvo soaked it up so now the little drops are green but in real life it looks OK!
So today it looks like we are moving from Tier 3 into full lockdown next week. At least I have a freshly pained craft space to spend my time in!
Oh and I bought a rather large rug online which covers MOST of the area I work in.... bets on bouncing ink pads anyone?????

If you're always trying to be normal, you'll never know how amazing you can be................
Saturday, 31 October 2020
Paint, Carpet and Ink
Tuesday, 27 October 2020
Sparklers
Today's card was one of those where you start by just trying things out and see if it looks OK.

I think this is such a pretty stamp and it will likely appear again in the not too distant future!
I had done a few square backgrounds using trees and a tiny deer stamp for some quick cards and they were in a small pile on the desk ready to go onto card bases - I put the newly embossed vellum piece over one of them.
I was quite happy with how it looked although the top right corner looked a little bare so I found a corner flourish (old old old) and silver embossed it.
Card done!
Does anyone remember Woodware making a product called 'Miracle Adhesive Film'? I bought a few packs of this probably more than 10 years ago now - it was specifically for use with vellum.

Sadly I have been unable to source it for several years but it really was brilliant to use for sticking vellum down completely transparently. I have yet to find any make of glue or tape that works as well.
As I now only have a few small sheets left I cut some small pieces for the corners instead of using the entire sheet - save as much as I can!
UPDATE 28TH OCTOBER - Thank you to my lovely visitors who have found a company in the UK who still have a few packs of this in stock. The power of blogland!!
Sharing my make over at
TIOT - Embossing
Christmas Kickstart - Festive Florals
We have another wet, windy and miserable day so with the ironing done and a (very) quick flick of the duster it's off to the inky space for me! Have a great day whatever you're doing. x
Saturday, 24 October 2020
Dawn Reflections or Sandra's Trees!

I masked off the bottom half of the stamp (the reflection bit) and stamped the top part first.
I found my Inkylicious little man in a boat and stamped him next.
I made a mask of him and then stamped the bottom part of SLT (Sandra's Lovely Trees!).
Held my breath that it would look OK when I removed the mask...... not too bad at all!
Inked my hills in Shaded Lilac and used Squeezed Lemonade and Tattered Rose for the rest of the sky, my coin (circle mask) moved a little so the circle isn't exactly circular but I hope it's only noticeable to me.
The water done with Weathered Wood and Stormy Sky.
I think he looks quite happy out there on his own surrounded by this lovely scenery.
Crafty Individuals has a Facebook Group HERE. There are challenges every month with prizes offereds - this month's challenge is called NEW DAWN. So countryside scenes, nature etc are all eligible. I know the Crafty Individuals DT would love to see you over there too!
Been a horrible wet and very windy day - we have a Wind Farm nearby and thought someone had come along and stolen the 12 of them - couldn't see it this morning the grey rain filled clouds were so low. And it hasn't improved much as the day has gone on so likely the pic isn't the best either!
I hope you are safe warm and dry wherever you are in blogland and thanks for visiting. x
Wednesday, 21 October 2020
Fern (and a long post!)
Spent yesterday outside in windy but sunshiney🌞 (and not too cold) weather preparing my pots and containers for the winter season. I have the fleece ready for my precious Camellia 🌺 and have re-arranged most into bigger groups so they can protect each other from the monstrous winds we get here. An added bonus was I got all my washing dry!
Today by contrast is dull grey and drizzly so a perfect excuse to sit at my favourite desk (and ignore the ironing 🙈).
After failing miserably last month, I have managed to actually finish the cards I made for the Twofer Challenge this month which has the theme of Silhouettes.

The hardest part for me was deciding which stamp to actually use but as I had used this SU fern stamp recently it was - well - there!

The background on the square card was a smooshed piece using Cracked Pisatchio and Spun Sugar.
The two teeny birdies (which I simply LOVE) are from Inkylicious and the sentiment is Technique Tuesday.
I think they are there for each other during this weird time we are living through hence the sentiment!
I lightly inked the edge with Black Soot and matted it onto black card.
It looked really stark on the white card base so I blended a little of the inks on it.
My second card is shadow stamped with the fern in Memento Tuxedo Black and the second stamping white heat embossed.
In the absence of a coloured card base which I could use, I blended Wheat coloured Versacolour ink for the background and spattered a few black droplets.

 Glad that I actually managed to link up this month instead of remembering 2 days after the challenge closes.
 I hope everyone is coping - it's tough when there doesn't seem to be any light at the end of this loooong tunnel.
But when all else fails there's always blogland......
and cake,
lots of cake.
In fact I have a rather nice Belljun Choklit cream filled Shoo Bun sat here on a plate next to me....
well it would be rude not to wouldn't it?
Take Care! x
Monday, 19 October 2020
An Old Favourite
Have been doing a variety of things the last few days ranging from struggling with a piece of vellum (😒) to making my fingers multi coloured with ink to shifting a ton of gravel (honestly) up several steps onto our garden!
So it was nice to be able to spend a couple of hours yesterday having a FaceTime chat with some crafting friends followed by a bit of CAS cardmaking!

I have had this die for such a long time. It's been used on Wedding
cards, Birthday cards, Sympathy cards - but this is the first time I
have used it on a Christmas card!
The snow dry embossed background piece was left over from something else and I used a wavy die to tidy up the ragged edge and gold embossed. In fact the whole card was made from leftover bits!
A mix of Festive Berries and Candied Apple inks for the larger flowers, and some gold metallic ink on the smaller pieces. Finished it off with some red Nuvo pearls for berries.
A couple of circles die cut and liberally spattered with the red ink and a gold heat embossed sentiment.
Didn't take too long to do!

We are on the highest lockdown restrictions again so likely there'll be more cards getting made as I try to find something to occupy myself now that the pots and containers don't need as much tending to.
Take care wherever you are in blogland. x
Thursday, 15 October 2020
A bit like buses....
A rare thing for me - I'm back with my second post of the day - I am absent for 5 days then I post twice in the space of a few hours! But had to share - couldn't wait!
Before I do, just want to say thank you to everyone who tried to help regarding replying to a question left as a comment on a post. I still can't reply (Carol H - I am not ignoring you) despite trying several things suggested. If you e mail me (on my profile) I can answer.

This stamp was designed by Sandra (Sandma's Cards) for Crafty Individuals. (CI- 552)
Be warned there's a few of them in Sandra's set and they're all wonderful!
(It would have been rude not support Sandra wouldn't it? - - - At least that's what I said to him indoors as I was clicking on BUY NOW 😉).
Used Arteza Waterbrush Pens to ink the bottom part of the stamp then some blendable pencils for the small riverbank in the background.
If you're like me, sometimes you look at stamps and think they need lots of inky backgrounds to make them work.
At first that's what I was going to do but changed my mind and am quite happy with how it turned out.
Sharing over at
MAWTT - Animals or Birds
Krafty Chicks - CAS
CAS Mix Up October Mid Month Reminder
My challenge of Tone on Tone stencilling over at CAS Mix Up has reached the mid way stage. Hope you can join in - it really is an easy technique and gives some great effects with your stencils.

For my mid month card I used Altenew inks.

Saturday, 10 October 2020
Autumn and a Reply to a Post?

Thursday, 8 October 2020
Landscape
One of the best things about blogging is the 'friendships' you make. I am very lucky to have made many with people who, like me, share a love of ink and paper. (And everything else crafty!)
A small (but select😊😊) few of my blogging friends have been able to recently spend a little more time together and we have been able to group message each other often and have group phone chats.
Being able to actually SEE each other (instead of just 'on-line' typing) has been wonderful and it has lifted my spirits. Sometimes circumstances bring people together in the unlikeliest way - and this is how this  card came into being.
Lynne has taken some gorgeous photos. Amongst them are spectacular sunsets. In a moment of madness someone suggested it would be fun to try and replicate them...... so Lynne set us a challenge to use any of her photos and interpret them any way we wanted.
I chose this photo.
It's stark landscape appealed to me!
Trying to capture something so awesome that Nature gives you might on the face of it seem not too difficult - HA!

I first tried doing a watercolour - and I was really pleased with the cloud formation at the top - the rest of it was not for human consumption!
Here is my effort done with ink blending.
Try as I might I could NOT get that lovely band of grey from the original photo to look right on my copy attempt.
Nor could I grab the vivid yellow of the sun as it sets!
But overall I am not too disappointed in how this turned out! The birds were my 'poetic licence'😉.
I am now off to visit Lynne, Sally, Sandra and Joan to see their creations.
Thanks for the challenge Lynne! x
Sunday, 4 October 2020
Blue tones
I started this card intending it to be my DT card for my Tone on Tone challenge at CAS Mix Up this month - but once it was completed I realised that there probably wasn't enough 'clear space' (actually there was NO clear space!!) and although I considered (briefly) cutting it into a panel, I decided against it as I liked the whole stencil!

I rarely use coloured card stock for a base but this card I thought was light enough to show up a stencil.
My 'Petal Burst' stencil is from Funky Fossil and I used Versamagic 'Sea Breeze' ink.
White heat embossed/ black sentiment, a few white enamel dots added, and after sponging lightly round the edges, I popped it onto the blue card base.
Happy crafting and stay safe wherever you are in the World. x
Autumn Day

Thursday, 1 October 2020
CAS Mix Up October Challenge
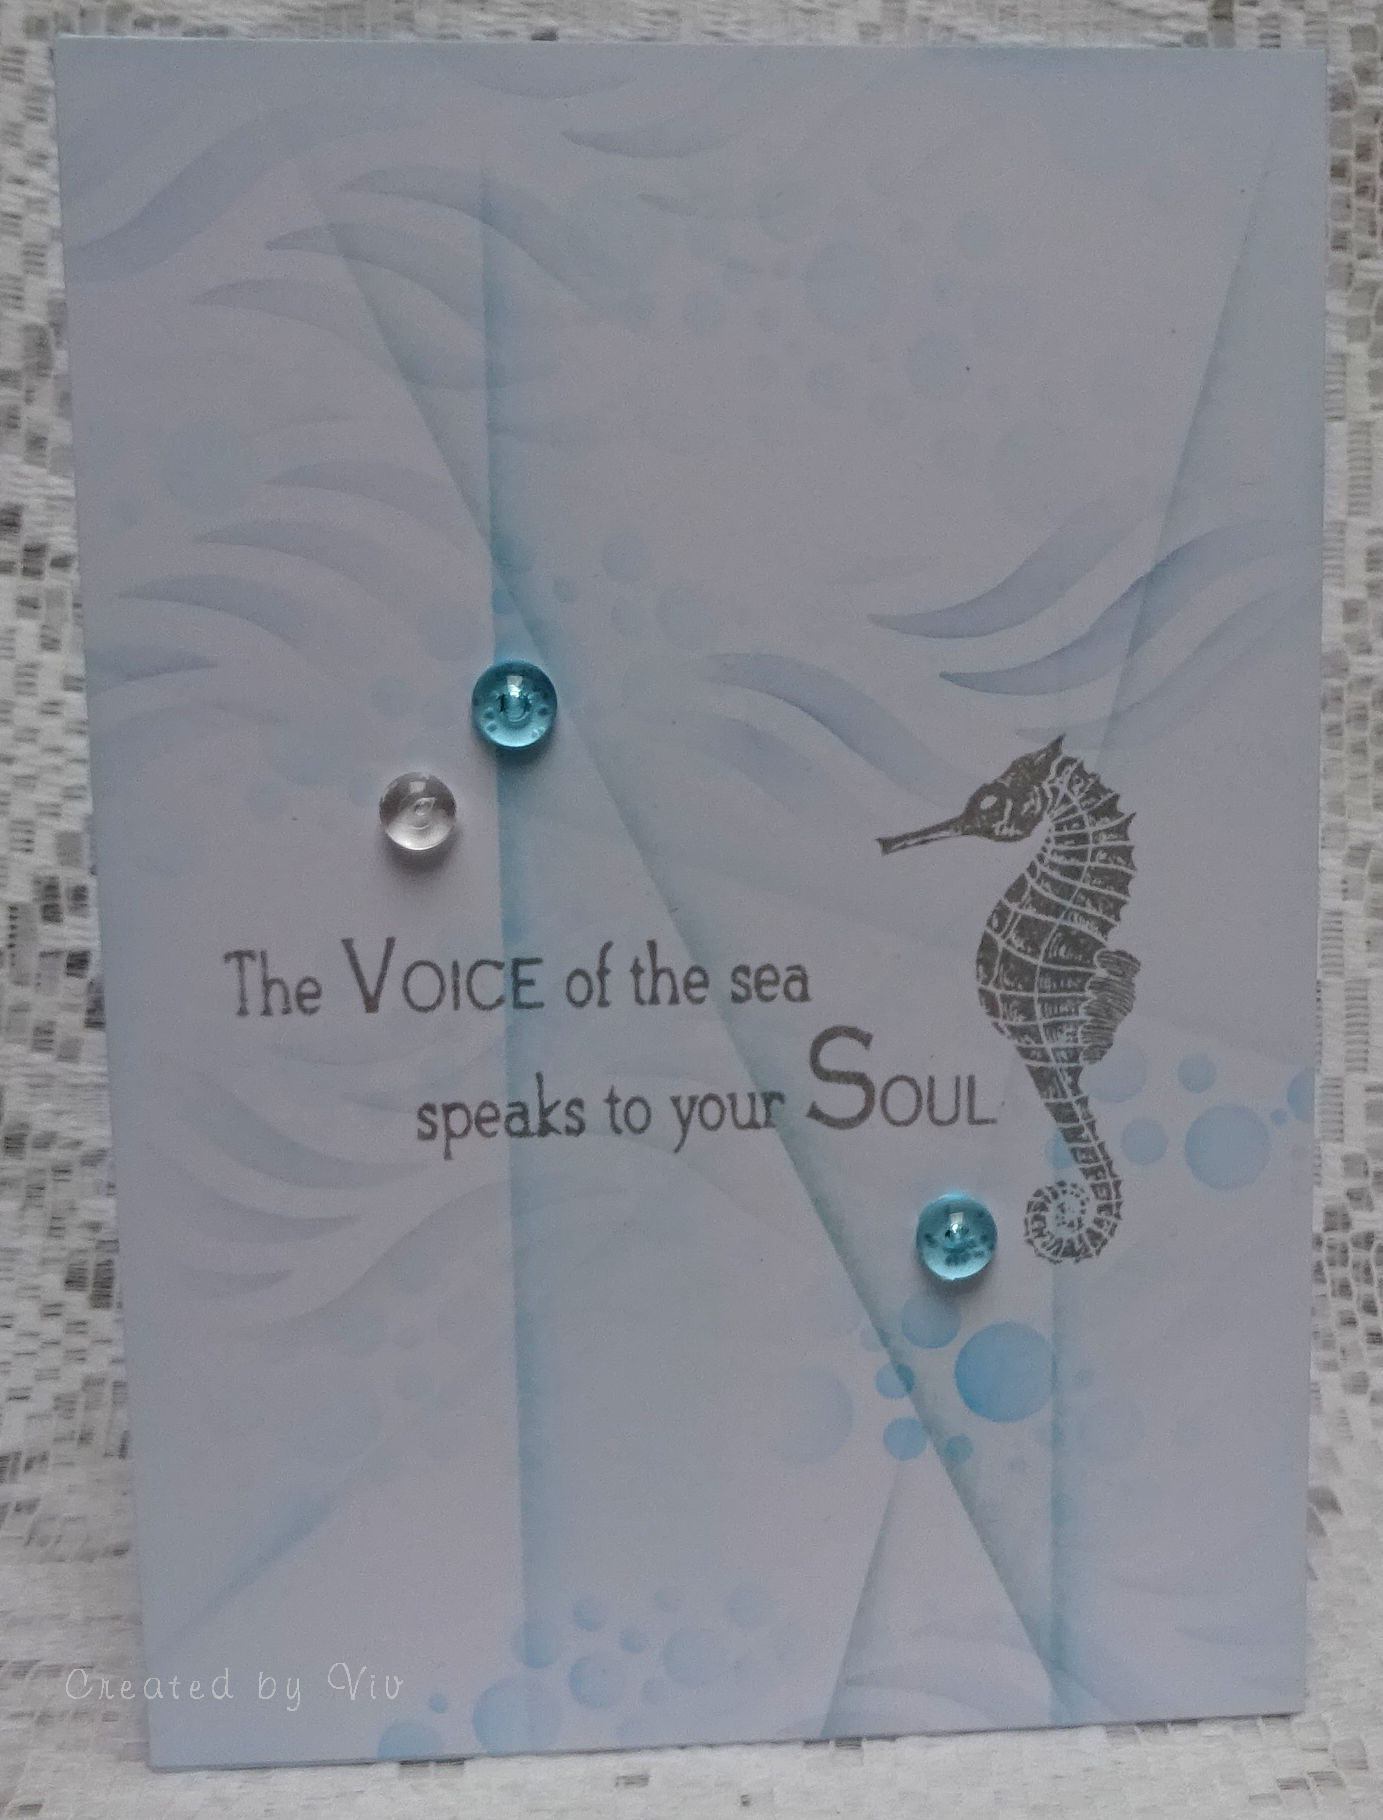
 There's some links over on the blog to give you some technique info but it really is just as the title of the challenge theme suggests.
I chose shades of blue - Tumbled Glass, Salty Ocean, Weathered Wood, Stormy Sky - a bubbles stencil and a waves stencil to be the background for my seahorse.
I added a couple of blue and clear drops to finish.
This was my first try at this geometric background technique using a piece of acetate for the straight lines and it won't be my last as I really like the soft abstract effect it achieves, so am looking forward to having more attempts with different shades.
Hope you will have a go at my challenge this month - and please check out the amazing creations from the rest of the DT!