Monday, 2 February 2009

Tag Your Arch!


Seeing as how I only commented a couple of days ago about how much I was enjoying making tags, imagine how I smiled when I saw this weeks challenge on Gothic Arches was called 'Tag Your Arch'!
I completely resisted the temptation to use one of the tags I had recently made and went off in search of this stamp.
It's one by Elusive Images and I really think it's pretty. I like the co-ordination and duplication between the large plate and the smaller tag.
I sponged and distressed the background in varying shades of pink and used watercolour paint to colour the hydrangea petals.
This arch and it's tag will prbably end up on a card!

Saturday, 31 January 2009

The Colour Purple!


This tag is for this week's challenge of 'Purple' on 'Tag You're It!'.

I like this background paper as I think it is really versatile and have it in a number of colours! So I covered my tag shape with the purple shade and then stamped the 2 dragonflies onto plain white cardstock.

I then sponged the white cardstock with ink pad colour ' Purple Rio' and used Mica shimmer powder 'Violet Frost' to paint the wings. The same shimmer powder was used to edge the flower petals.

I decided to attach the top dragonfly with 3d foam pads to give it a raised effect and finally I added some pale purple ribbon.

I fear I am becoming hooked on making tags!!

Engagement


I haven't made any cards for a while but one of my friends asked me to make an engagement card. After concentrating on other things recently, it's suprising how out of the habit of working on a larger project you can get.

Anyway, I was asked to incorporate some kind of envelope on the card so that the present (gift vouchers) could fit inside.

This is what I came up with. The paper is from 'The Luxury Stack' which is quite heavy weight cardstock so was perfect for folding into a holder and also for the pocket to house the holder in. It has a lovely pearlised finish which makes it perfect for weddings, christenings etc.
I decided against making a proper envelope as I felt the paper was too thick so instead stuck with the idea of a tag attached to a holder which can be easily removed by simply sliding out.

I used some vintage edging to highlight the edge of the card and the trifold pocket. I rubbed some 'Antique Lace' Distress Ink over the fabric heart to give it a vintage look and added the same vintage edging, then attached it to the card with a gold heart shaped brad.

I am not a great lover of 'peel-off's' but feel that sometimes they're the best option on cards - I could have stamped the little hearts and the initials of the recipients but as I made a promise to use up some of my old stash I used the peel off's instead!!

Friday, 30 January 2009

Picture folder - 6th Album, 6th Picture


I was tagged by Pattie and Anne to do this and will join in the fun, but I hope they'll forgive me for not tagging anyone else to do it....

The idea is you for to open your picture album on your PC and pick the 6th picture from the 6th Album. My 6th Album is the one that relates to my ancestry research and houses all the photos of my ancestors I have acquired over the last 4-5 years during the course of my compiling my family tree.

This photo is a picture of my Great - Great Grandfather who was born in Ireland in 1806 and was a Sergeant in the Royal Irish Constabulary.

He and his wife had 11 children. One died, 8 of the children emigrated to Australia, one remained in Ireland and the other, my Great- Grandfather left Ireland after serving in the 1st Royal Dragoons, moved to England, became a policeman for a short time and then eventually moved to Liverpool.
My Great-Great-Grandfather and his wife lived in great hardship in Ireland until the 1880's when, despite their advancing years, they embarked on the long journey to Australia.

He died just 18 months after being reunited with his children and his wife died 5 years later.

Wednesday, 28 January 2009

Tres Chic


The Wednesday Stamper theme was handbags. I sat and thought about using some vintage papers and making that the basis for my project but after a while decided to try something a bit different (well for me anyway!).
I had a card template in a handbag shape so used that. The only rule with Wednesday Stamper is you must use at least one stamp! The little dress stamp I have had since I don't know when and never used and the words were on a fashion plate stamp again bought ages ago and never used!
I highlighted the edge of the black card with white ink and poked about in the ribbon drawer (another thing I must get round to tidying!) till I found the spotty ribbon. The crystal buckle was meant to give the 'bag' a bit of 'haute couture'!!

Monday, 26 January 2009

Never judge a book......


....by it's cover! Margaret's challenge this week was a Triptych ATC on any theme. I like the shape of this one as it is just a scaled down version of a gothic arch!
I used several varying shades of blue ink and sponged the background then stamped several of the 'Ink and Nibs' stamps by Invoke. On the front 'doors' I used a small book embellishment and cut out some specs and case from a Tag Art book by Paper Pizazz. Inside, the same book supplied the image of the lady in her reading room. I painted over the entire ATC with mica shimmer powder in Tropic Blue. The finished ATC has a gorgeous shimmery look to it which isn't completely captured by the photo.
TMTA's challenge this week was the colour 'Ice Blue' and I've submitted this - I hope it fits in with the challenge!
Oh and I almost forgot.. a huge THANK YOU to Maureen who gave me an award for being creative - I really appreciate it and it's now on the right hand side of my page!

Saturday, 24 January 2009

What time is it?


When I was small I was told you could tell what time it was by blowing the 'fluffy bits' on a dandelion after it has finished flowering and counting how many times it took you to get rid of all the seeds. I can't remember whether it was an accurate way to tell the time or not but I do remember doing it! Now I curse the wind and small children who blow the seeds as I am convinced they have an in built homing device which leads them to my garden where dandelions flourish in abundance!


The 'Tag You're It' theme this week was Numbers.


I used three different colours of Distress Inks for this tag. I sponged the background with 'Scattered Straw' and stamped the numbers with ' Shabby Shutters'. I used 'Peeled Paint' for definition to the edges.


The dandelion head was embossed in 'Seafoam White' and I finished by rubbing some of the distress ink over the fabric flower.

'THE ALTERED ATC' - wall art incoporating matchbox window shrines


This shrine was the SIS project for Jan/Feb. (Details of SIS can be found here )
The project was to make a 'shrine' using a matchbox and an ATC.
I chose the theme of 'Love' cos it's February and also because I have had this 3 heart embellishment for over 2 years which was rescued from the inside of another project (didn't turn out the way I wanted so it went in the bin!) The 3 hearts and it's red background are air dried clay which have been painted. This fitted perfectly in the inside of the matchbox.
I used gold embossed paper for the box and toned it down a little using black ink and red ink 'dabbers' as the gold was too shiny for my liking - I wanted to achieve a muted 'antique' effect for the frame and box.
So the matchbox was used to house my hearts and the ATC was then cut out to make a window type frame. The ATC was covered in the same paper and toned down like the box. I added the metal embellishments, a tassel and some fibres.
(There is a tutorial on this project written by Ange and it can be viewed here if you fancy trying it! )
Lots To Do have set a theme of 'Frames' for this week so have entered this into the challenge!

Rainbow in Paris!


I recently received some Paris themes ATC's as a result of a 'lottery' on the NI group. I have lots of themes that I like and Paris is included in the list! Consequently I have had some Paris themed ATC's from one to one trades in my album too.
It seems such a pity to own these little works of art and not have them on display so I decided to start putting them on 'Themed' canvases with the idea being that I put them on the walls in the 'den' and display them in rotation.
So here is the first of the themed canvas project which is entitled 'Parisienne Rainbow'! The background is chalked and stamped, with some beads and other embellishments added and the finished piece measures 15" x 12".

Tuesday, 20 January 2009


Margaret set us a challenge this week of 'Birds' on MAMMA's Monday Musings. I have to confess this ATC took me ages to do - and the finished product is really only a paper collage with a feather! I found the composition difficult - put it down to this dreadful cough making my already bad neck even worse!

As usual, finding the images took me an age.... good job I found the birdie pic last - poor old song sparrow would have well fallen off his perch waiting for me to find the music sheet...will somebody please come tell me why I put a music sheet into the 'hobbies' folder when I have a folder specifically for music sheets? Not that there's many in the hobbies folder............ they're obviously filed somewhere else too! Used Basic Grey paper for the background, Sparrow image came originally from Flickr as did the Music Sheet. Distressed the papers with Antique Linen distress ink, stamped a few musical notes around sparrow and added the feather.

Sunday, 18 January 2009

Gypsies


Today the Gothic Arches theme is 'Gypsies'. Here is an arch I made yesterday but couldn't post till today!
This image is from Dover publications although it took me some time to find it as my filing system leaves a lot to be desired. (Isn't it annoying when you know you have something that will fit the theme and you've no idea where you put it?)
The background paper is from DCWV 'The Luxury Stack' - this pad is full of cardstock weight pearlised prints in lovely pastel colours and although the photo doesn't show it very well, this piece has a pale green sheen to it.
I had to search the internet for suitable gypsy proverbs or sayings and although I found one or two that I liked ( such as - 'A tear in the eye is a wound in the heart'), the 'wanderers' one seemed to fit in with the image. I also found the 'Romany' sheet music cover amongst some downloaded vintage images that I had saved some considerable time ago!
The chain embellishment was taken from a necklace and earring set which I picked up in a local charity shop. The flat silver coins appeared similar to those worn round the neck of the romany girl in the picture and I thought complemented and highlighted the overall view of the arch.

Saturday, 17 January 2009

Tag


I have been able to have a crafting day today as I am still bothered with a nasty cough so I needed to stay indoors.(My excuse anyway!) One of the good things about having lots of time is you can trawl through all the challenge sites and then work your way through them!
Tag You're It! had posted a challenge yesterday called 'Sugar Candy Kisses', so this morning I sat and made this little tag which I thought would be suitable for a new baby. (One of the things I think about tags is they can also be made into a greeting card with a little bit of imaginiation so this one may well end up on a card at some time in the future if I can find a suitable background!)
Anne (one of my 'Blogging Stamper' sisters) had sent me these brilliant images of fairies on top of their own cakes last year and this was the last one- it seemed perfect for the challenge.
After mounting the fairy and her cake on top of some thick card, I used foam pads to raise her up from the actual tag and a pink patchwork button instead of an eyelet to secure the ribbon. Some glitter glue applied to accentuate her wings, a tiny paper heart in the bottom left hand corner and a couple of buttons 'holding' on the greeting of 'Hello Cupcake' and my tag was done!

Thursday, 15 January 2009

Young Marie and her Beau?


Over at Theme Thursday, todays challenge was 'Couples'.

I have developed a liking for all things outrageously tragic and French as my blogging friend Margaret is obsessed with Marie Antoinette! This image reminded me instantly of Marie Anionette as it depicts all the outrageous fashion of the time, the powdered wigs, huge skirts and of course the painted on beauty spot! (A 'must have' fashion item at the time). The collarless dress jacket and breeches with the fancy waistcoat worn by the boy shows that during the early to mid 1800's, the clothes worn by middle and upperclass children older than toddlers (especially by girls) continued to be uncomfortable-looking miniature copies of the clothes worn by adults, with the exception that girls wore back-fastening bodices and petticoats rather than open-fronted robes. Towards the end of the 1780's, there was a change to styles that were more practical for children's play — long trousers for boys, and loose ankle-length skirts for girls. I bet they were delighted! I printed the photo onto glossy paper and then edged it on 3 sides with black glitter card, finishing off with a glossy black and silver flourish that I think came from a Christmas card! The sliver and black embossed backing paper was edged in black sequins and a pearl heart attached at the bottom. I finished the piece with a crystal 'shoe' buckle similar to the boy's shoe and threaded some black lace through to mirror the downright extravagance of the period! (And also to make something that the recipient could hang it up with!!! )

Sunday, 11 January 2009

Heart


Over at MAMMA, there is a Valentine's challenge using a heart shaped template.

I am not good with a sewing needle and find working with fabric quite difficult so I opted for the safe old paper creation! Whilst I have in my list of favorites things pink, romantic and vintage I decided to have a change for this challenge.
The background of this heart is handmade paper which has been 'crinkled' although this doesn't show up very well on the photo. (In fact, I am not pleased with this photo as I was happy with this project once I'd completed it and I don't think this shows it off to it's best, so trust me, it DOES look better in 'real life'! If you want a better view just click on the picture - it makes it larger and clearer.)
After adding the crinkle paper, I double edged the heart with two different layers of lace. I placed a second layer of corrugated card over the back attaching the brown hanging ribbon before glueing.
The little brown spotty heart at the top is made from thin wood and I added fibres, a flower and a skeleton leaf and two fabric butterflies before attaching the silver 'Love' word charm. Over at 'Created by Hand' the challenge was to create something using the word Love - so here it is!

Saturday, 10 January 2009

Paris Children


I am a member of a group called 'New Inspirations' and every month there is a 'lottery' to win all the ATC's made by other group members. The previous winner gets to select the next theme and this month's theme as selected by Trudy was Paris.
Crafters love anything to do with Paris! - there's so much scope to let your imagination run away!
Anyway I have had this paper for ages and have been waiting for an opportunity to use it. I again scanned it and made it smaller then cut out the images I wanted to use. After collaging, I used 'Tattered Rose' Distress Ink round the edges and overlaid it with 'Antique Linen' Distress Ink.
I love shrink plastic! So out came the stamps and the luggage tag, Eiffel Tower and Arc de Triomphe were all stamped with Stazon and then shrunk!
I hope whoever wins this month's lottery likes it.

Friday, 9 January 2009

Gentlemen

Here is my ATC made for this weeks MAMMA challenge. The theme was 'Men'.
I reprinted the background paper to less than 50% of it's original size as I liked the design but it was too big for an ATC.
I stamped the 'real gentlemen' image with Stazon onto a kitchen work surface sample (part of an extensive collection from a local DIY store when I couldn't make my mind up about what worktop to have in the kitchen!). I like the effect of the stamp as it has turned out with a 'mottled' look instead of just perfectly flat and smooth.

Cut up Body Parts!


Things here have finally calmed down a little so to all my blogging friends a belated Happy New Year to you and yours.


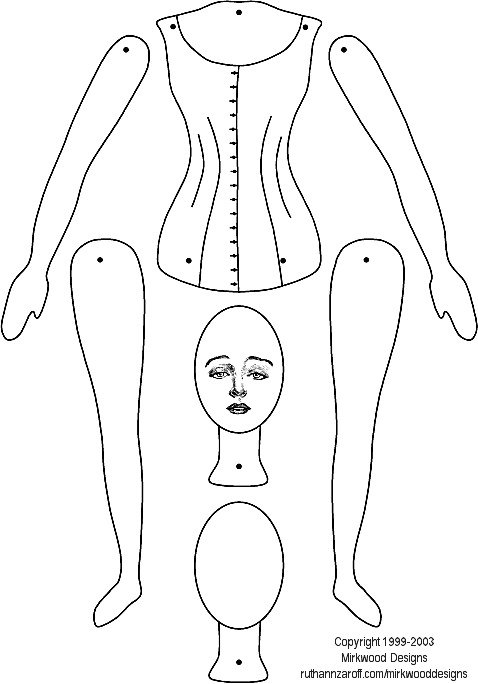
I have spent a couple of hours each day for the last couple of days trying to rise to the latest challenge set by Margaret. In another moment of lunacy she decided to start another MAMMA group, this one is aptly entitled MAD MAMMA and although you may think the title reflects me very well it actually stands for Monthly Art Dolls!

This is the first time I have tried to make one of these dolls and it's from a template by Mirkwood. The rubbish bin alongside me has been full of body parts as I have struggled beyond belief to make something that even remotely resembled a doll!

I used gold embossing powder on her arms and legs and some corrugated gold card for her torso. I coloured her face with a gold Sakura pen and then added the glitter thread to make her hair. My original idea was to give her a gold hand gun and call her 'girl with the golden gun ' (my apologies to James Bond fans) but ditched the idea when I found the large gold wire heart in my scraps box. So she is just now the 'Golden Girl with 2 hearts'! I am not sure if I shall leave her in for the swap as I think the back is a bit of a mess but those who have seen her so far think she is OK - I have another template cut out and another idea buzzing round in my head - suppose I'd better empty the bin before I start!

Sunday, 28 December 2008

Rhapsody in Blue {Part 2}


People who have followed my blog from the very beginning will have seen the jigsaw piece used in this project before.
This was my very first attempt at an altered jigsaw and the piece itself was sent to me by Maureen earlier this year with a comment to 'enjoy yourself'.
The jiggy bit has sat in a box along with some other made pieces and although I hadn't forgotten about it, I didn't know what to do with it!!
At Christmas some very good friends bought me some crafting goodies, which included two canvases. As crafting has been difficult of late I have tried to ease myself back into the swing of things by making this to hang on the workroom wall (now officially christened 'The Den'!)
The canvas was painted with a blue acrylic wash, 'faded denim' distress ink used on the music score background (which was edged with mulberry paper for some definition) and the large jiggy then attached. The charms are on samples of 'black gloss' worktop pieces obtained from a local DIY store (which I got when I was trying to decide what colour worktop to have in my new kitchen 3 years ago! - Knew they would come in handy.....) These worktop samples have a really high gloss finish which doesn't show very well on the photo, and the charms look really effective on them! Finally I added the small jiggy with the conductor and then used Stazon 'Azure' ink for the flourishes and completed the piece with the flower embellishments. The completed piece measures 12" by 9".
Now all I need to do is arm myself with the hammer and look for another picture hook!

Friday, 26 December 2008

I finally finished this little fridge magnet a couple of days ago. It's now stuck firmly to the door of the freezer here in my new work room!
I love this stamp, I have used it numerous times in various projects but it has never lost it's appeal to me!
This image was stamped onto vellum then coloured and some irridescent glitter applied to the wings.
The charms were in a pack that I got from a friend for my birthday and it's taken me this long to get round to using any of them!

I saw this saying for the first time applied to the side of a car about four years ago with the words - 'In memory of our friend ........., ' underneath.
I found it very emotive that these people had obviously lost someone close to them in a traffic accident and had paid tribute to him in this way.
I have never forgotten the phrase, nor it's message.

Saturday, 20 December 2008

Enter The Dragon!


I have had so little time lately. I haven't even put up the Christmas Tree and am still a couple of presents short. The other things that have required my attention have prevented me from doing any serious crafting and I have felt real guilty that I haven't been able to send all my very good crafting friends a little something to show how much I appreciate their friendship, encouragement and inspiration. I had started to make a few things earlier in the year so for the last few days I have set about finishing them and sending them off to their intended recipients. The whole Christmas thing has had me really stressed out this year with so many other family things that I have needed to do.


This hopefully should have arrived at it's new home by now. It's ATC size and the background is acrylic paint, shimmer powders and red embossing powder. The fabric dragon was one of my purchases at the NEC earlier in the year.

Wednesday, 10 December 2008

Catching Up


Sadly, a family matter has prevented me from posting or crafting recently. I made these two Christmas ornaments before things took a downward turn and have been meaning to post them for a while. These are both now at their new home. They were made from parchment overlaid onto metallic gold card. The card had eyelets punched into it at the top of each triangle. Before threading the ribbon through I put in a tiny 'surprise'. Once I'd finished the parchment overlay I added some glitter glue to highlight the 'bauble's' on the tree and the petals of the Christmas Rose. The ribbon was then threaded through the top of the parchy and knotted to make it secure. Both ornaments are now with their recipient waiting to be opened on Christmas morning. Although I still have things to do family wise, I am hoping that very soon I now will be able to find some spare time to do some crafting before Christmas, I need the solace and comfort that losing myself in the creation of something can bring.


Saturday, 29 November 2008

Time please!

I have recently taken part in 2 jigsaw jams as those of you who have followed my blog recently will know. I have sat today and completed my 'Time' themed one and this is the result.
I random painted the canvas with acrylic paints. I made the clock face by using a downloaded image scaled to the size I wanted, then added my 'Queen of the Last Minute' stamp in the centre (again scaled down). After colouring with gel pens and distressing the main part of the face I then triple embossed it. The six jiggy bits were done by (from the top) Wendy K, Sheila C, Cindy, Me, Sherry and Jinny. They are fabulous pieces and the small picture on here doesn't do them justice. My other jammers put so much effort and creativity into their jiggy bits, I was completely overwhelmed when they all started to arrive.
Finally I added the metal letters before assembling it all onto the canvas.
I am really happy with this piece. The builders have finished in the new workroom and I am expecting to be settled in there next week..... complete with new clock!

Wednesday, 26 November 2008

Early Present


What a great surprise today... A parcel arrived from Tennessee, USA and when I opened it here she was! Isn't she fabulous?!

This amazing work is called 'Granny and Gingerbread Boy' ..'Granny' is about 4" tall and the little gingerbread boy is clasped anxiously against Granny's ample bosom!

It was sculpted by one of the most talented people I have 'met' in Blogland. Her name is Renee Buchanan.

I think Renee's work is amazing. She works with polymer clay and fashions the most awesome figures. Granny here has a look of terror on her face as if somone is about to run off with her little gingerbread boy - (or even worse, eat him!)!

You can view Renees work at http://ragtreepeople.blogspot.com/. Each piece she makes is an original, one of a kind. Her work is also for sale- so if you're looking for something a bit different for Christmas go visit her blog and follow her link to her shopping site!


In the meantime Renee, thank you so much!

Monday, 24 November 2008

Decorations


Margaret is hosting a Christmas Bauble Decoration swap. All the baubles are the same size and shape and we could embellish in any way. Time has been at a premium for me this past week but I found a few hours yesterday to craft.

My new work room is almost completed, so I really need to be sorting out the stash all crafters accumulate rather than actually creating....but I am so ill disciplined!

The poinsetta decoration was cut from a piece of Christmas ribbon and fixed onto some strong card. I then mounted it onto some glitter card and embellished the edge in gold. I used gold and pearl seed beads to highlight the centre. The back is identical to the front.

The other is an attempt to use some of the christmas craft stuff housed in a red box! I found the domed snowman skulking away at the bottom of the box and the foam words and snowflaes were in yet another box inside the big red one!
I really am going to have to be more strict with myself... I still have so much to do...my backgrounds for my jigsaw jams to finish, some more cards for my crafting friends, (daren't send THEM shop bought ones!), blinds etc to buy for the new work room, the whole house needs cleaning as we have also had some work done inside whilst the builders were here and of course I have to sort the crafting stuff out as mentioned earlier! That LITTLE job alone will probably take me to Christmas!

But I have just had a quick look through the challenge sites.....and there ae sooooo many interesting challenge themes this week..................................

Sunday, 16 November 2008

Wings of Joy


Double dose today! Don't post for a week then put two on together..(not really together as it's now quite late and the other post today was this afternoon!)

Anyway, this is the final altered jigsaw for the Christmas swap. Margaret had set the theme as 'Wings' and had indicated she wanted to use the piece as a hanging decoation and not mount on the usual piece of canvas with the other pieces. Her colours were white, gold and red.

I used this parchment pattern for some Christmas cards last year and thought the huge oversized wings would suit Margaret's theme.

I triple embossed the jiggy background before assembling the angel. The body and the wings are done separately, and the wings are in 3 separate pieces. The angel is then assembled using silicone glue to give a 3d effect.

I have also decorated the back of the piece in a simple manner just by using a white embossed background as a base and stamping some script over and finally adding a small paper dove in an attempt to complement the 'Wings' theme.

The parchment angel is very delicate and I don't suppose it'll stand up to a lot of bashing about - so it'll be lashings of bubble wrap tomorrow before I post it., then I shall just keep everything crossed and hope that it arrives at Margaret's undamaged.
Now this is done, I can look forward to the postman bringing my completed pieces from the others in the jamand get on with ding my own pieces and my canvas background
June is offering blog candy for the best altered jigsaw piece and has invited me to enter. As I don't know which one to link, I have just linked them all!

Yet another Jiggy......


This week has passed me by completely. I've been watching the builders get on with the garage conversion (the new workroom/office looks great and I can't wait to get in there), visiting the physio, attended a family funeral, went to a craft fair in Birmingham (spent lots!) and finally today sat down and did some crafting!

This is another jigsaw piece for the Christmas Jam. This is for Carol who had set the theme of 'Vintage' and the colours red and gold. I painted the piece with acrylic paint and blasted with the heat gun, adding some embossing powder in red, gold and my favourite 'enchanted gold' (which I confess to being completely addicted to because I love the 'fairy stardust' effect it gives) I used gold embossing powder on the chipboard embellishments and the vintage image inside the 'jolly holiday' frame is one of my favourites.

I secured the frame and the dangling star with gold star brads and added fabric stars, some sequins and beads on gold thread and threaded gold ribbon through the 'Christmas' chipboard to finish.
Over at Objet D'art this week the challenge is to make something altered and include a frame in your piece. Jennie (who has created some fab things) suggested I enter this for this week's challenge.....duly done Jennie!
I really enjoyed doing this piece. Have one more to do then I intend to sort out all the stash from Friday and sit down and play with it!
June is offering blog candy for the best altered jigsaw piece and has invited me to enter... problem is I don't know which one to put in.....so have just linked them all!

Sunday, 9 November 2008

Jiggy's Galore!

I'm taking part in a Christmas Jigsaw Jam swap and another jigsaw jam on any theme. When each person receives all their swaps back the finished pieces are mounted on canvas to make a complete art piece. As our garage conversion is now under way I am hoping that my two jiggy jam canvases will be the first to be displayed in the new work room/office.

The jigsaw piece on the left is for Wendy's 'Oriental' theme made by using mulberry paper and stamping with gold embossing powder, adding some threaded beads and chinese lucky coin and the one on the right is for her Christmas theme of 'Angels'. This was done by stamping the Angel image, then inking over in varying shades, sprinkling some gold dust embossing powder over to give the sparkly effect, then I added the stars and chipboard words.


These two are for Sherry. Sherry asked for a 'Folk Art' Christmas piece and a red and gold piece which had to include a musical reference. These two pieces are both mixed media collages. I used some 'Shaker' embellishments for 'Happy Holidays' and as I didn't have a gold angel charm I improvised by using gold leaf over a silver one for the 'Angel of Joy'.


This piece is for Cindy. Cindy's theme was 'Things with Wings'. I had been sent this image by Anne and thought it was spot on for Cindy's challenge!
The background paper is from the 'Once Upon A Time' stack and I embossed the edges of the piece with gold embossing powder, after putting a tiny piece of torn vellum in the top left corner.
The words came with the image and I added a gem dragonfly and a gem 'buckle' to the dress!
Finally some gold and green fibres were fixed to the bottom for a 'dangly bit'!!
June is offering blog candy for the best altered jigsaw piece and has invited me to enter. Can't choose which one I like best so am just going to link them all!

Work in Progress


Card making has taken a bit of a back seat lately, mainly because I made a mountain this year for my breast cancer fund raising but also partly becasue I wanted to be doing other challenges!
Christmas card making is seriously bad this year, will probably end up having to buy some! With a distinct lack of enthusiasm, I've probably made about 30 to date with half of these done with basic stamping. Here are a few I did using just a couple of different stamps. The Santa stamp is one of those that you can use plain and colour in, or if you're in a hurry just stamp with embossing powder (which is what I did!) as is the group of trees. The Holly card was embossed onto vellum and red acrylic paint used for the berries and the door was a stamp with UTEE over to give a glossy finish.

All need greetings to be added apart from the holly one and as usual I shall be doing that just before I put them in the envelopes!

Thursday, 6 November 2008

Remembrance

Maggie set her weekly challenge as Remembrance with Armistice Day fast approaching.
I thought a lot about this theme. A week or so ago we had done a Vintage challenge and I'd make a tag with an image of a WW1 soldier and the words from the poem Flanders Fields so I wanted to do something different for this week's.
I remembered seeing this photo of the soldier overcome by his grief crouching down in front of the line of boots and rifles which depicted all his fallen comrades and thought this was a fitting image to use.
The 'Soldiers Poem' is a a favourite and I think it reminds us all that our freedoms were obtained at great cost.
I printed the poem over a Union Jack on acetate and placed it over white card.
The blue cross is in remembrance of all those who paid the ultimate price and the cream ribbons and dove the symbol of hope and peace.

Sunday, 2 November 2008

Vintage Children


I have waited a while to use this photo plate and the theme on Gothic Arches this week was 'Vintage Children' so I finally got an opportunity.
I opted to use Ranger Distress Ink in Frayed Burlap colour on the plate rather than an ordinary ink stamp. The backing paper is one of my favourites (this was the last sheet too!)and I just used Versacolour around the edges of the arch. A chipboard jigsaw piece and numbers tag fixed through a piece of brown ribbon by a brad and some lace finished the project.
As this is an original photo plate I wonder who these young ladies are? They've got to be sisters and this family photo probably took pride of place in some drawing room a long time ago!
(To have a good look at the photo plate just click on the picture - it will then zoom in so you can see the plate properly).

Wednesday, 29 October 2008

Forever Autumn


Lots to Do has the theme of Nature this week.
I think Autumn is a lovely time of the year. I love to see the leaves changing colours, there are some many different hues
(Mind you, I just wish they would stay on the trees as I'm not so keen in having to get out the rake to scoop all the dropped leaves up from the lawns!)
This unmounted stamp is just a single tree, so I needed to stamp a couple of times in varying shades to try and get some appearance of depth, and I added the buttons in different colours again to try and reflect the shades of the leaves I can see at the moment in my garden.
It is unseasonly cold here at the moment, some snow flurries all over the country but hopefully this won't last.
Autumn should be clear blue skies and cold windy days - it shouldn't be grey skies and snow!

Monday, 27 October 2008

Wee Witches

This is my second Halloween Arch! This one though is for the 'Wee Witches' theme over on Gothic Arches this week.

It is similar in style to the last one I made, and I've used the lovely spiders web fabric I picked up at the local haberdashers as the background. I like 'cute' in moderation but am not normally pre disposed to use lots of it in my work.... but I actually liked this image of the cute wee witch! I tried to lose some of the 'kitschy' by using a copy of an old poster advsing the towns residents to rid themselves of the evil that had moved into their neighbourhood!

The tiny decorative bat, moon and pumpkin brads were a present from the USA (Thanks Renee!)

How Fairy Tales were really written....


Over on Rainbow Lady's blog the challenge this week was 'magical and mysterious'. I have had this stamp for a while and thought it could be used to interpret the magical world of fairy tales. I'm not sure if it really fits in with the theme but have linked it anyway!

Several different colours were used to ink the background, then the gold lettering stamped and embossed. I added lace, a star brad to hold the tag and a fabric flower. The words are from the 'Once Upon a Time' paper stack.

Saturday, 25 October 2008

O Christmas Tree


Halloween not yet here and the shops are already full of Christmas stuff! Quite depressing really, it seems to me all the magic of Christmas I experienced as a young girl has disappeared completely. I remember well the excitement of seeing the first Christmas tree in the front window of a house or the tree and Nativity scene that was placed outside the local church mid December...now the decorations are up at the end of October, making the christmas 'season' almost as long as the four natural ones!
Anyway, without wishing to become like 'Scrooge' altogether I decided to take part in this weeks challenge on Tag You're It - Christmas Tree!

This tag is a scaled down version of a hand made Christmas Card. I sponged the white card with 'fir tree' colour ink and drew the 'tree' in gold pen. Overlaid a piece of vellum that had been edge embossed with 'seafoam white' and added gems for sparkle on the branches of the drawn tree. A piece of green organza ribbon and a red corrugated card tub finished the tag.

Wednesday, 22 October 2008

Monochrome

This week


This weeks Mamma challenge was 'Black and White'. For some inexplicable reason I found this challenge difficult. I had lots of ideas but nothing came together properly.

I wanted to do a plain stark composition but after a total disaster with a gouache and ink drawing (twice!!- my drawing is dreadful), I gave up that particular idea..... so it was (sigh) back to the Fimo faces!
This ATC is so similar to an altered CD I did some time ago but was the best I could come up with. This morning I now have loads of monochrome ideas whizzing round in my head but these will have to be put on the back burner.

The background paper is cut from a card sent to me by Renee in the USA last week. She must have had a premonition about this weeks challenge cos it fitted the theme perfectly.
I was happy that on this fimo face I managed to do her heart shaped beauty spot perfectly, less happy that once again I smudged her eyeliner!